Top 7 Spiffy Infusionsoft Order Form Features You Didn’t Know Were Possible
Out of the box, Infusionsoft order forms leave a lot to be desired.
The basic Infusionsoft order forms are not mobile-optimized, they’re not optimized for conversions, they’re hard to edit, and – to put it bluntly – they’re ugly.
Most people spend hours AND thousands of dollars hiring developers to custom code even some basic functionality into their Infusionsoft Order Forms. That’s why we created Spiffy – to provide cutting-edge and conversion optimized order forms at a fraction of the cost and the time. Spiffy is the easiest way for anyone to create beautiful, conversion-optimized Infusionsoft order forms.
On top of all of the awesome drag-and-drop elements you have access to in the Spiffy Builder, we also created some amazing copy/paste code snippets that let you add extra functionality to the Infusionsoft order form, and create the conversion-crushing order forms you’ve always wanted.
Below are Spiffy’s extra top seven features that you can add to your order form, that are all copy & paste simple.
- Terms & Conditions with Scroll Box and Time Stamp Options
- Translate your Infusionsoft Order Form to a Different Language
- Create an “Update Billing Info” Page Using an Infusionsoft Order Form
- Change the State/Providence Field into a Drop Down Selection
- A True One-Click Upsell (No Actionset) On The Infusionsoft Order Form
- Add Custom Fields to Your Infusionsoft Order Form
- Disable PayPal as a Payment Option On a Single Order Form
These are just seven of 30+ code snippets that are available to every Spiffy customer.
If you already have a Spiffy account, you have access to all of our advanced snippets – just login into your Spiffy account and click on “Snippets” at the top of your dashboard.
If you’re not yet a Spiffy customer, take advantage of these awesome features and dozens of other benefits!
Don’t go another day without optimized order forms. Increase your conversions starting now.
Create Your Spiffy Account Today!
Here are a few of the most-awesome things you can do to Infusionsoft order forms with Spiffy.
1) Terms & Conditions Checkbox with Scroll Box and Time Stamp
Infusionsoft order forms do not offer the ability to link to your Terms and Conditions or to have a Terms and Conditions checkbox. Without this feature, your forms are not FTC compliant which can cause some very big issues for your company.
With Spiffy though, you can add a T&C link to all your order forms, and with our Advanced Snippets Library, you can add a checkbox, and even record a timestamp of when the checkbox is clicked!
We’ve already done the heavy lifting for you, so all you need to do is copy & paste our T&C Snippet codes into your Infusionsoft form. The steps are listed below, and we also have a tutorial video you can watch here: Spiffy Terms & Conditions Tutorial
Option 1: Terms & Conditions Checkbox
Before you begin, you will need to add your Terms & Conditions URL into your Spiffy settings.
Once that is complete, you can go to the Spiffy Advanced Snippets page (link above) and grab the code for the Terms & Conditions Checkbox. This snippet will add a T&C checkbox that people must check prior to completing their order.
All you have to do is place our done for you code in the “Custom Footer” section of your Infusionsoft Order Form and it will dynamically pull in the terms URL you set within Spiffy. Save the form and boom! You are all set.
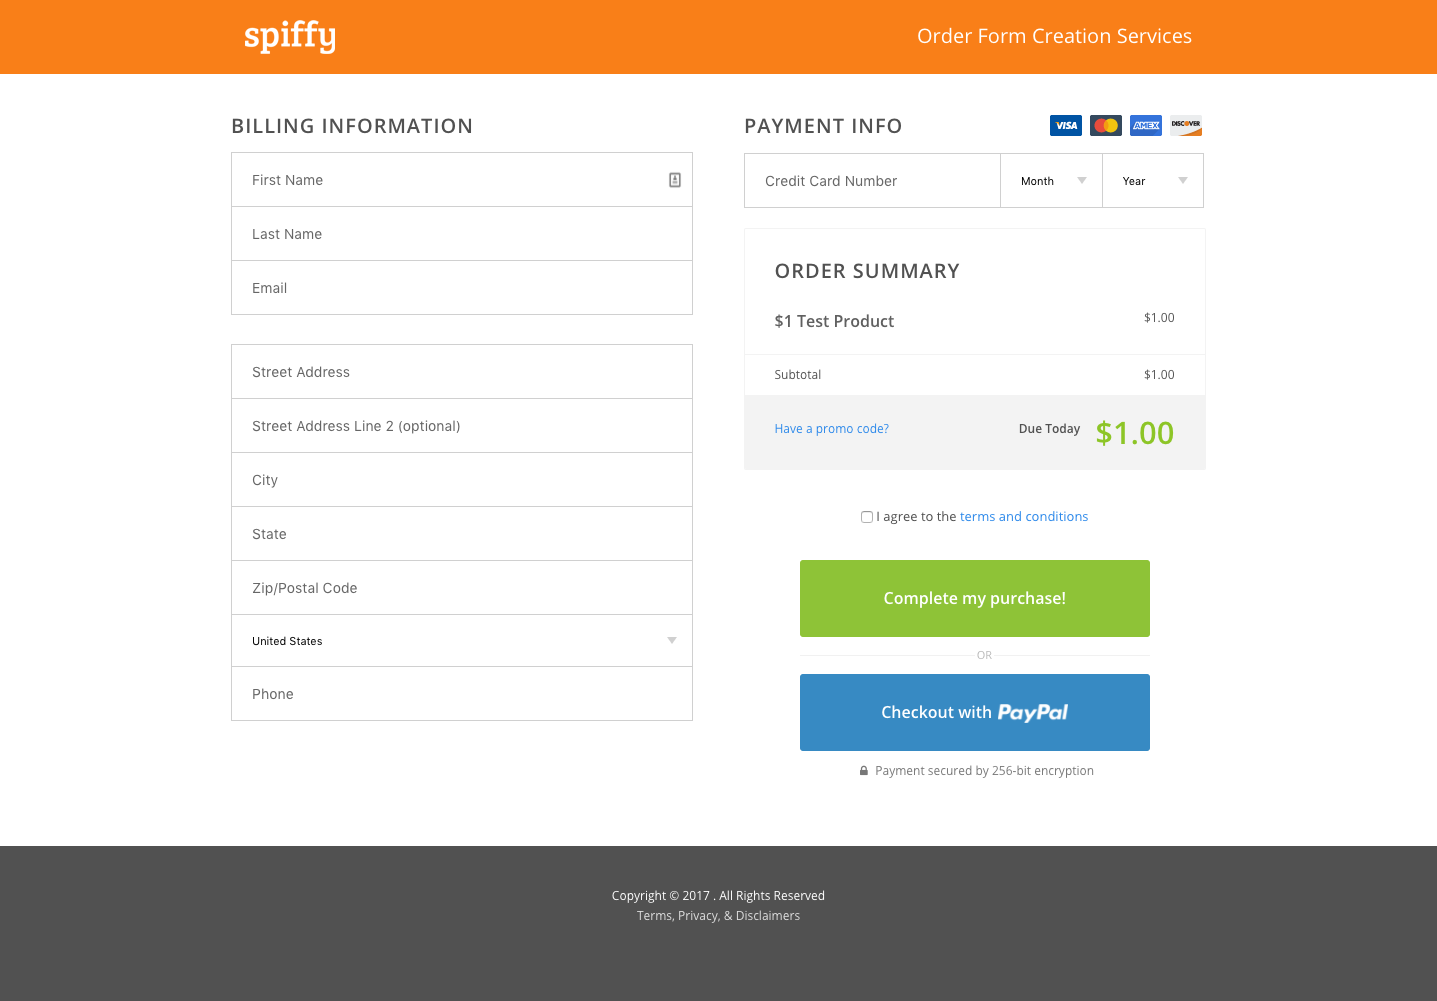
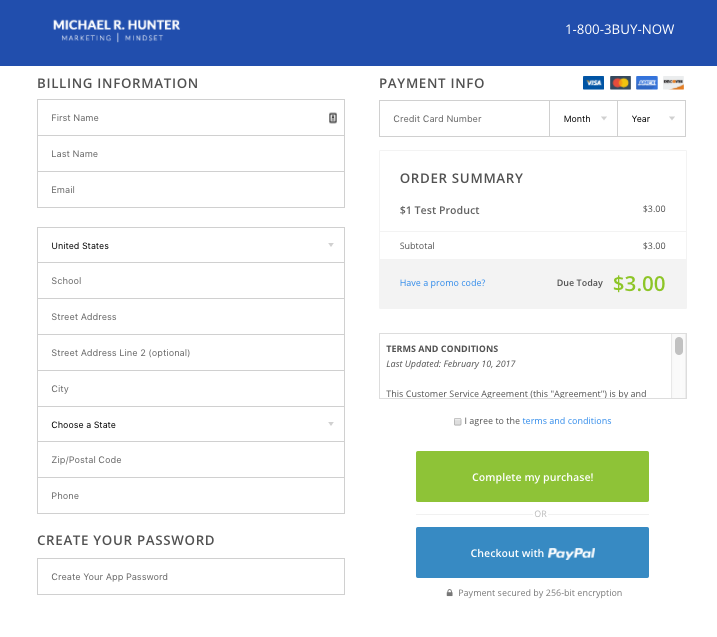
Option 2: Terms & Conditions Checkbox + Scrolling Text Box
This snippet will add a terms and conditions checkbox with a scrolling text box that displays your terms as shown in the example above. People must check the box prior to completing their order.
Once you have the snippet code, you will need to edit the HTML code to add in your own terms and conditions text in place of our placeholder text. Then paste your updated code snippet into the “Custom Footer” section of your Infusionsoft Order Form. This will also dynamically pull in the terms URL you set within Spiffy.
Option 3: Create a TimeStamp in a Custom Field for the Terms & Conditions Checkbox
This snippet requires the Terms and Conditions Checkbox snippet listed above (Option 1 or 2).
Many companies find it very useful, and even necessary to be able to show when a customer has checked a T&C box. We received so many requests for this, that we created a new awesome custom snippet that would do just that.
When this code is placed on your Infusionsoft order form, it will add a timestamp to a hidden custom field that will show you when the user checks the T&C checkbox on the form.
To use this snippet, you will have to create a custom order field and edit name value of the custom field in the first line of the provided code.
We’ve found that creating a custom order field, rather than a custom contact field was ideal, because it doesn’t take up your custom contact fields. It also then shows up on the actual order record, making it easy to access when looking at a contact’s order history.
Once you have completed the above steps, you simply place the code in the “Custom Footer” section of your Infusionsoft Order Form. Be sure you also have the Terms and Conditions snippet copy/pasted into Infusionsoft, and be sure to change the name value in the first line of the code to match the name of your custom field.
Once you’ve finished, you will have the ability to track and record when a buyer has checked and agreed to your terms and conditions. Now how cool is that?
2) Translate Infusionsoft Order Form Labels
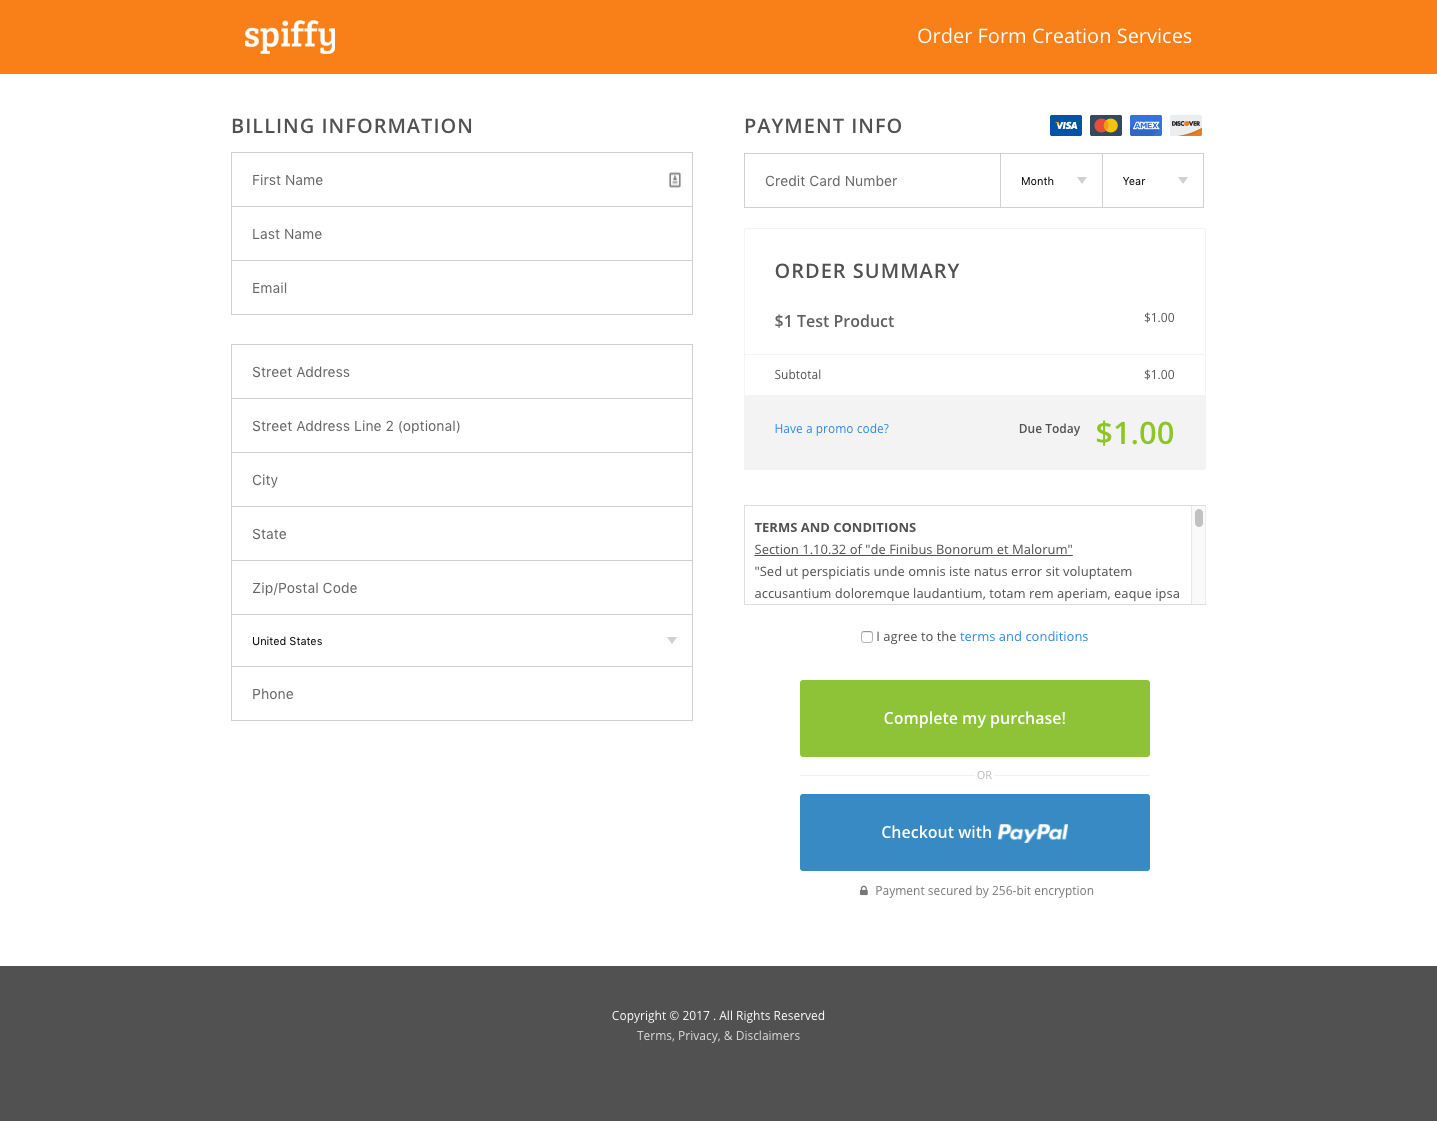
Do you sell your product in multiple countries? If so, this feature is for you! The Spiffy Translation Snippet allows you to translate all of the labels on your order form into any language you would like.
In the top section of the code, you will change the value for each label into your translated text of your desired language. Then just place the finished code in the “Custom Footer” section of your Infusionsoft Order Form and viola! You now have an order form in a different language. Here is an example of a form that was translated using the custom code:
You can also watch our Spiffy tutorial that walks you through the setup here: Spiffy Translate Your Order Form Tutorial
3) Create an “Update Billing Info” Page Using an Infusionsoft Order Form
If you have a subscription based product, you know how much of a pain it is to get payment information updated in Infusionsoft. That’s why we created a snippet that will transform an ordinary Infusionsoft order form into an Billing Information Update Page!
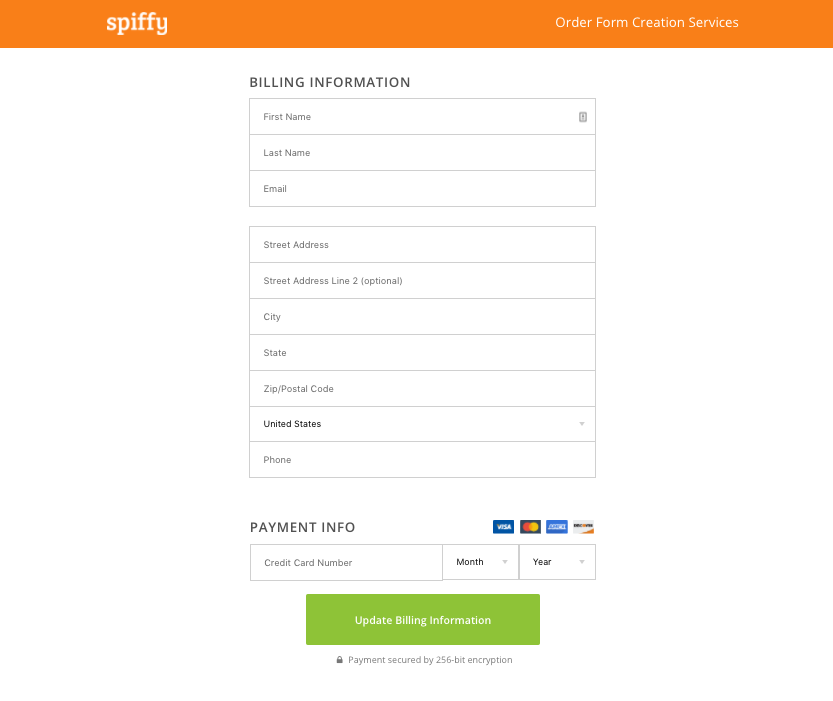
Pretty nifty don’t you think? 😉
We do this by hiding the “Order Summary Section” and a couple other small tweaks to make the page look more like a billing info update page vs. an order form.
The first step is to create a free product in Infusionsoft, and create an Infusionsoft order form that has that free product.
The update billing information page is essentially directing the customer to enter their CC information and purchase a free product. This is the easiest way to get your customer’s CC information updated in your Infusionsoft application.
Once that’s ready to go, just grab the code snippet and add it to the “Custom Footer” of your Infusionsoft form! You can also watch our tutorial video on the process here: Spiffy Billing Information Page Tutorial.
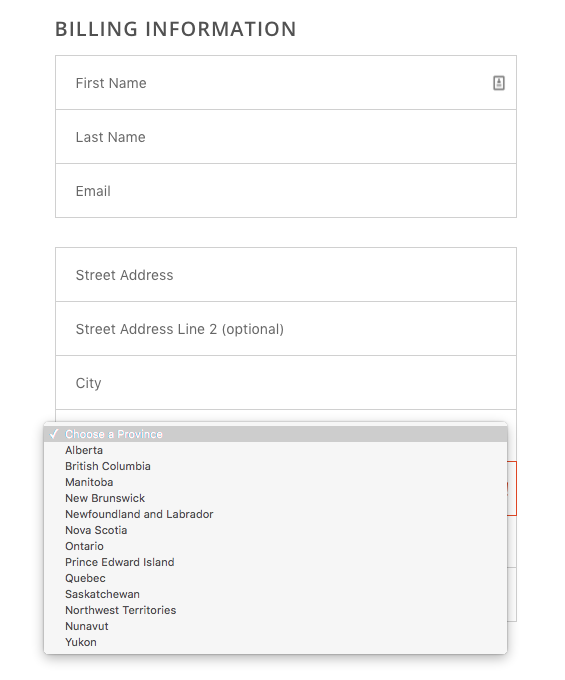
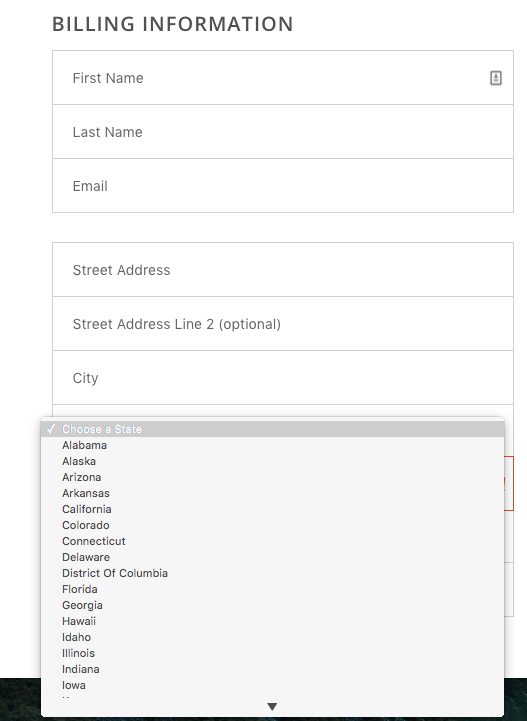
4) State/Providence Drop Down Field on a Infusionsoft Order Form (Taxes Purposes)
If you sell products in the United States or Canada, it may be useful for you to have a State or Providence drop down list on your forms for tax purposes.
We have a handy little snippet that lets you do just that.
When someone selects “United States” or “Canada” as the country on your order form, this snippet will restrict the input for each state/providence selection to one set variable.
IE: Arizona will ALWAYS be entered as AZ instead of people inputting Arizona, Ariz, etc.
This creates cleaner contact records and makes calculating taxes, running searches, etc. much easier.
And of course, it’s copy and paste simple!
Just grab the snippet code and pop it into your Infusionsoft order form, and you are ready to roll!
Here’s an example of what your forms can look like with this feature:
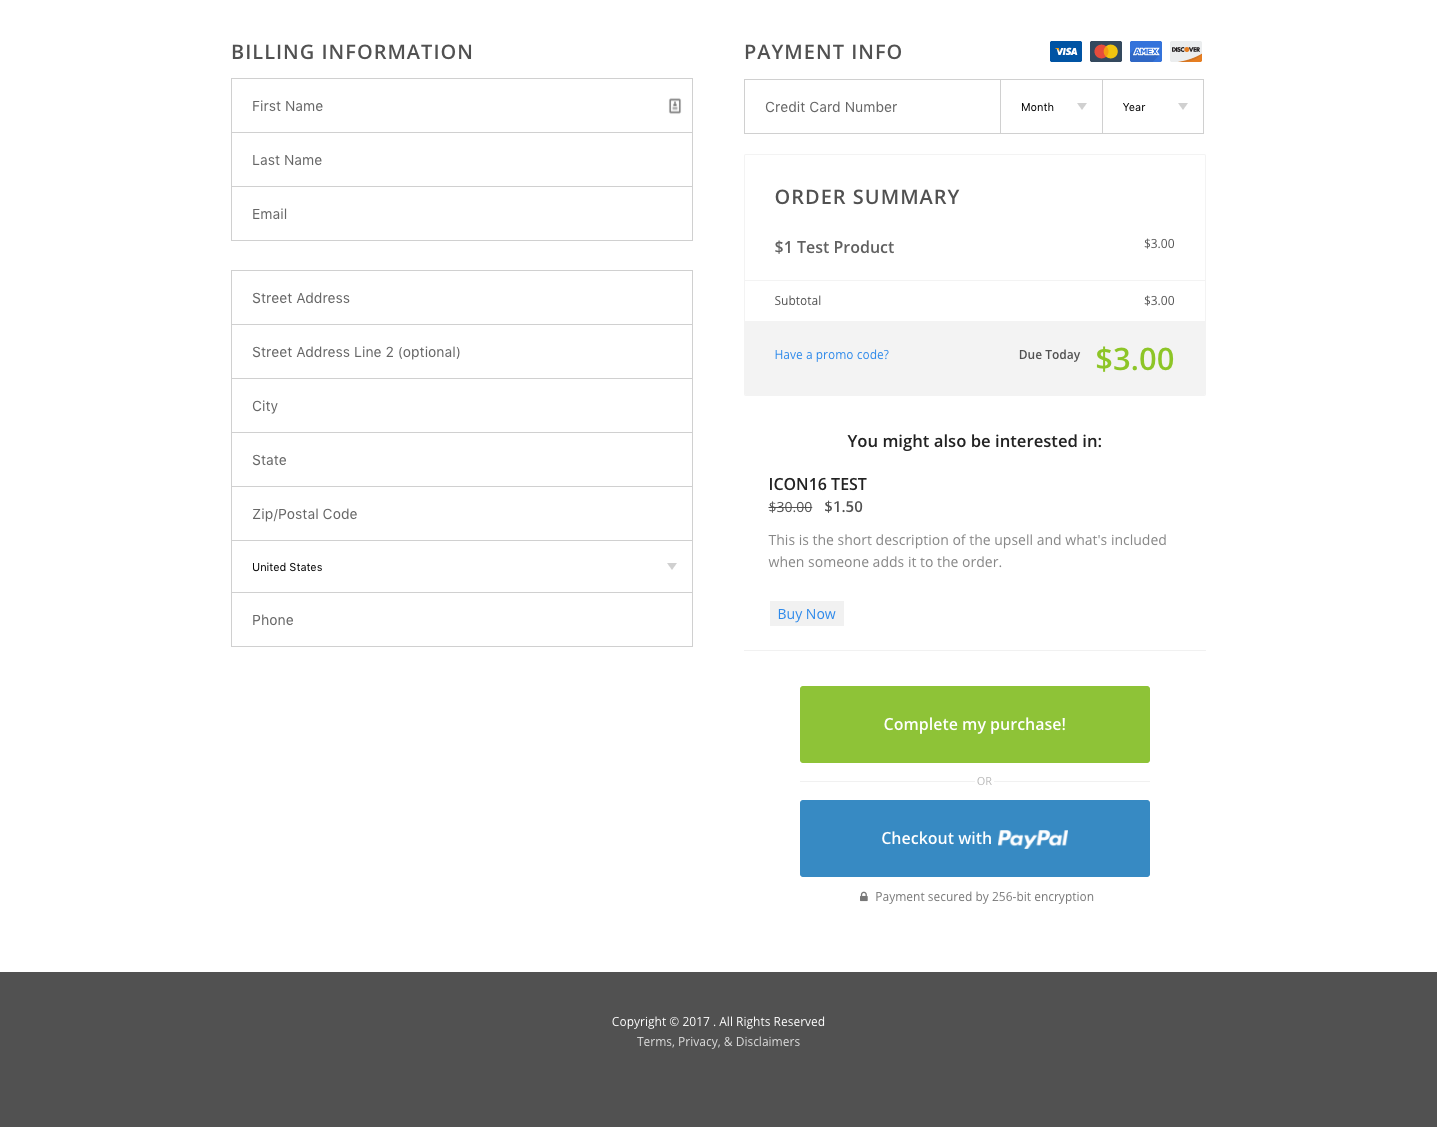
5) One-Click Upsell For Infusionsoft Order Forms
Adding one-click upsells to your order forms is very powerful. It’s the #1 thing you can do to boost revenue and your lifetime value of a customer.
Studies show that adding them to your checkout process can increase your revenue by up to 5% – 20% or more! Wow!
Infusionsoft currently allows you to attach an upsell to your forms, but it just sits below your standard product. And, you’re extremely limited on how you can present the upsell offer. Kinda lame.
That’s the boring standard Infusionsoft upsell box, below the order total.
Well lucky for you, our developers are overachievers, and they created an awesome custom code that allows you to add a true, one-click upsell experience to your forms.
The Spiffy/Infusionsoft One-Click Upsell snippet will look like a true one-click upsell page below, and will add the upsell product to the existing order, rather than having to ninja a bunch of stuff together in campaign builder and run an actionset and have two separate orders.
This one-click upsell will activate when someone clicks the “Complete My Purchase” button.
Instead of going directly to a “Thank You” page, the potential customer will see a full-screen upsell page. The customer then has the option to click “Yes, Add to My Order” or “No Thanks, Complete My Purchase Now”.
If they choose to get the upsell, our code adds the additional product to their order, and processes the transaction for both products in one payment.
If they choose no, the order processes just the original product they selected. where they can choose to “Yes, Add this to my order too!” or “No, don’t add this and complete checkout!”.
Also, you can add any content you want on this page, including an upsell video. Powerful stuff.
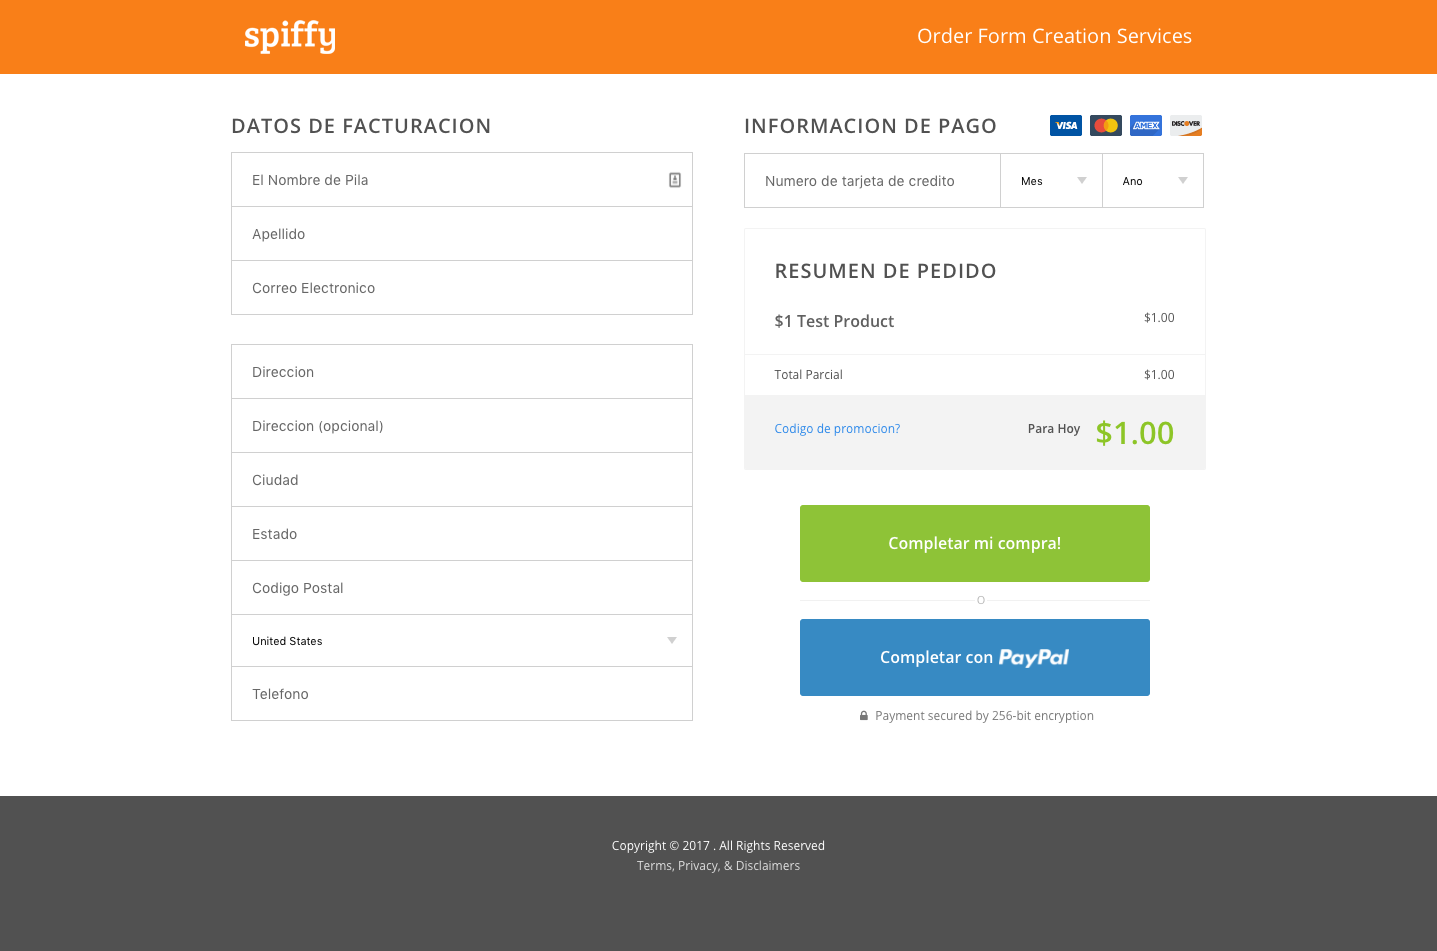
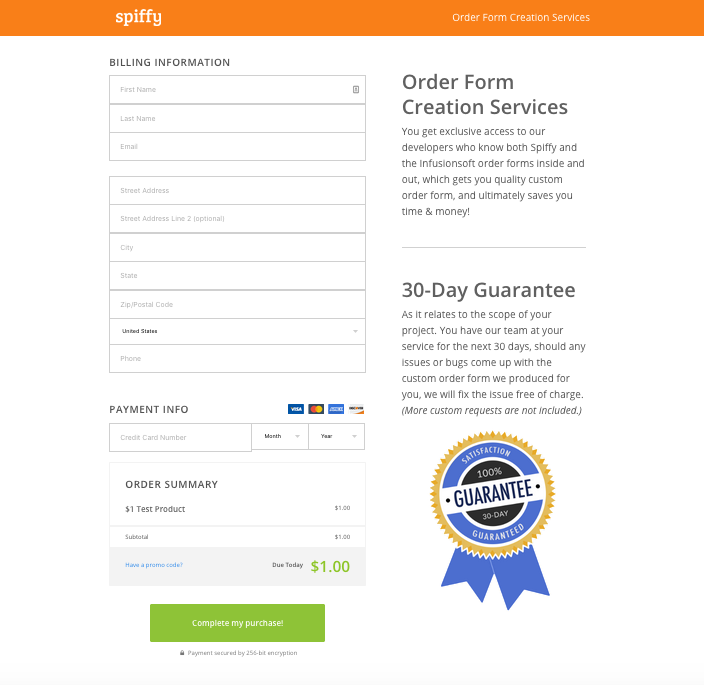
Here’s a few snap shots of the Spiffy, one-click Infusionsoft upsell in action, on an order form:
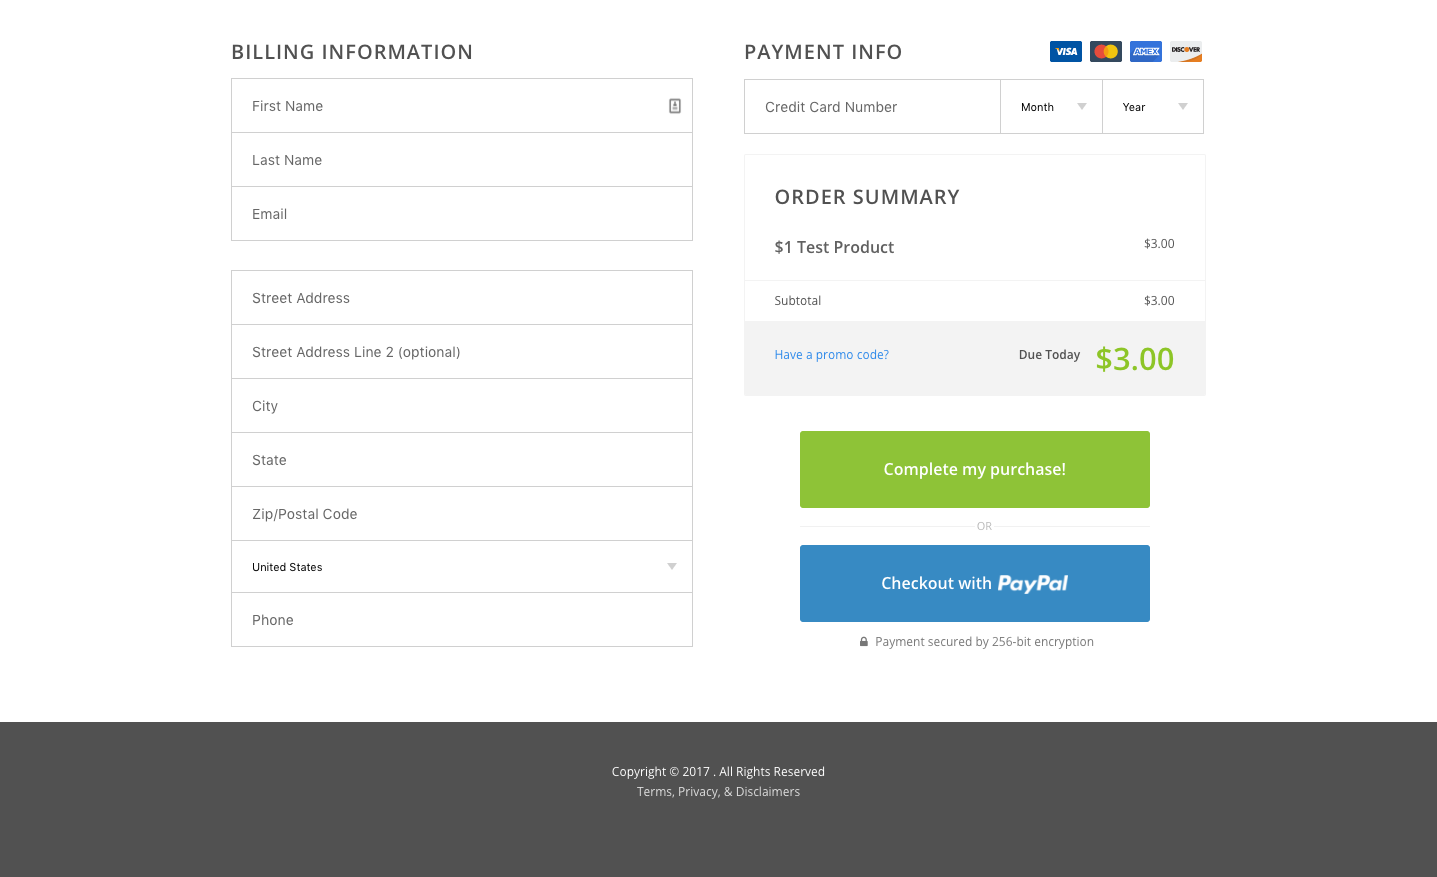
Image Above: The Infusionsoft order form with the Spiffy One-Click Upsell snippet – Before Someone Clicks Buy.
When they click “Complete My Purchase!” they will see this page that is fully customizable:

Image Above: The Spiffy Upsell Page!
Now your customers can get the super powerful, one time offer upsells that = more money in your pocket. Talk about a killer feature! Since this is one of the more complicated snippets, we created a tutorial video so you can see exactly how to set it up: Spiffy One-Click Upsell Tutorial.
6) Add a Custom Field to Your Infusionsoft Order Form
This code helps you collect more information on your Infusionsoft order forms and store them within custom fields in your Infusionsoft contact records – you can watch the tutorial video and learn more here. This is an advanced snippet and may require some technical knowledge of HTML.
First, you will need to decide what type of custom field you want to use: text field, required text field, text area, drop down menu, radio buttons, custom order field, or custom subscription field. We have a specific code for each of these options.
Once you know what kind of custom field you want to add, you will need to create that field inside Infusionsoft, then come and grab the appropriate code snippet in our library.
This field piece of the code will be placed in the “Custom Header” section of your Infusionsoft order form, and the 2nd piece of the code will be placed in the “Custom Footer” section of your Infusionsoft order form.
Once you have added those sections, your form is ready to go and give you the custom order information you need! Check out this example showing a custom field that sets a customer’s password:
7) Disable the PayPal Payment Option For A Single Infusionsoft Order Form
This does exactly as the heading implies – it hides PayPal as an option on the specific order form you put the code snippet on.
Simply copy, paste and add it to the “Custom Footer” section of your Infusionsoft Order Form.
______________________
Well, that wraps up our Top 7 Features Spiffy Makes Possible for Your Infusionsoft Order Forms!
What are your favorites? Did you see anything that you want to implement in your business right away?
Create your Spiffy account today, and create your beautiful, conversion-optimized order form today!
Want to see more examples of some awesome Spiffy forms?
Check out our Inspiration Gallery here!
https://gospiffy.com/examples/
Who knows, you might inspire our next Spiffy feature!
Thanks for reading!